第三次
1. 初识 hadoop shell 命令
在启动 dfs 后,可以通过 Hadoop 提供的 shell 命令进行操作
hadoop fs -<命令> <参数>2. 创建项目
2.0. 预备
- 在 http://maven.apache.org/download.cgi 下载 maven.
- 在宿主机上解压 maven,放在一个文件夹中。
2.1. 修改 maven settings
路径在 maven/conf/settings.xml
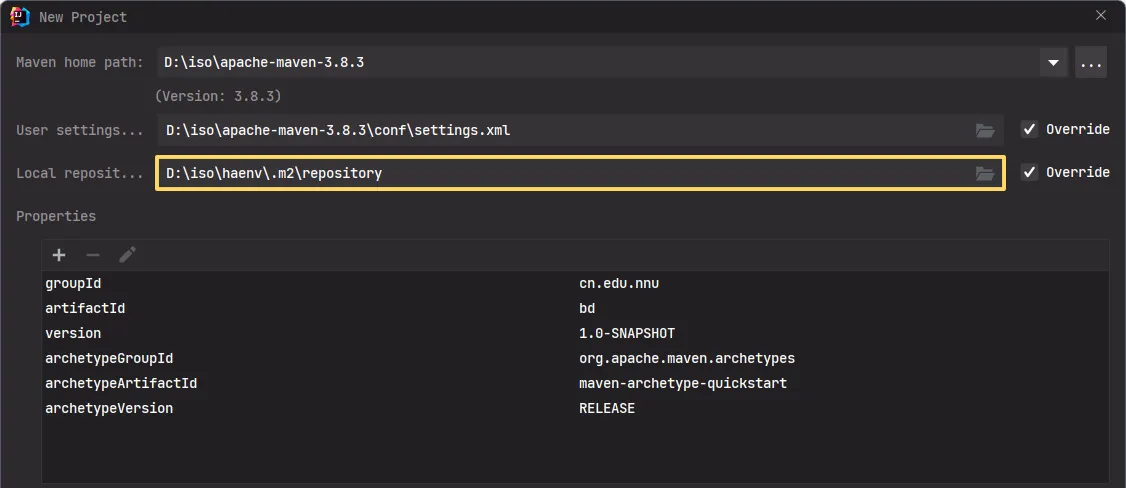
2.1.1. 修改本地仓库路径
<localRepository>D:\\iso\\haenv\\.m2\\repository</localRepository>Caution
Windows 下的文件目录使用 \\ 来进行引导
2.1.2. 修改镜像为阿里云
<mirror> <id>alimaven</id> <name>aliyun maven</name> <url>http://maven.aliyun.com/nexus/content/repositories/central/</url> <mirrorOf>central</mirrorOf></mirror>2.2. 通过 IDEA 创建项目
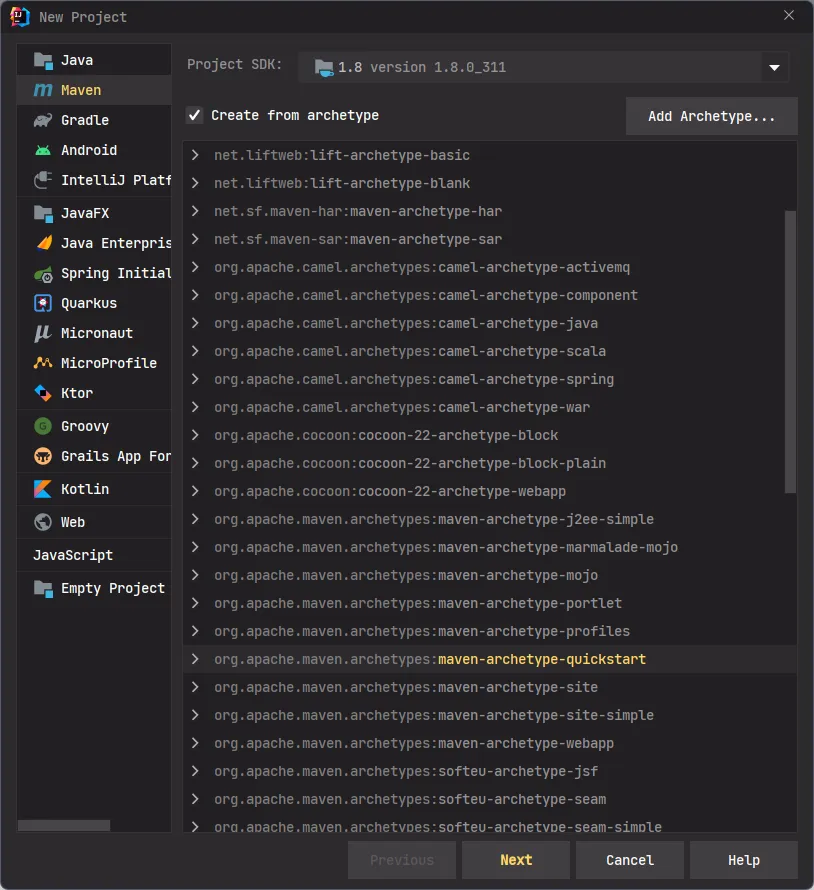
2.2.1. 通过 maven 环境管理创建
- JDK 1.8
- create from archetype
- maven-archetype-quickstart
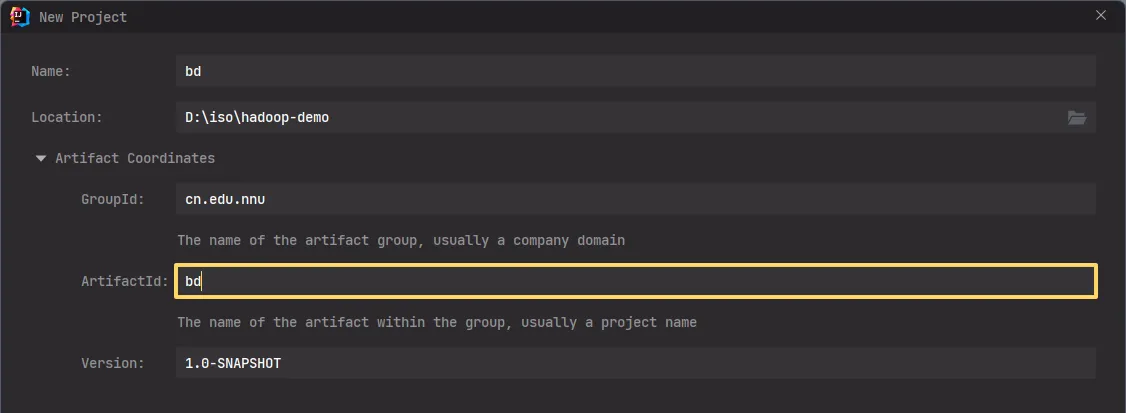
2.2.2. 选择项目目录,并写入 GroupId,以及项目名称
2.2.3. 选择刚刚在 maven settings 中修改的配置
2.2.4. 自动下载
2.3. 修改项目配置
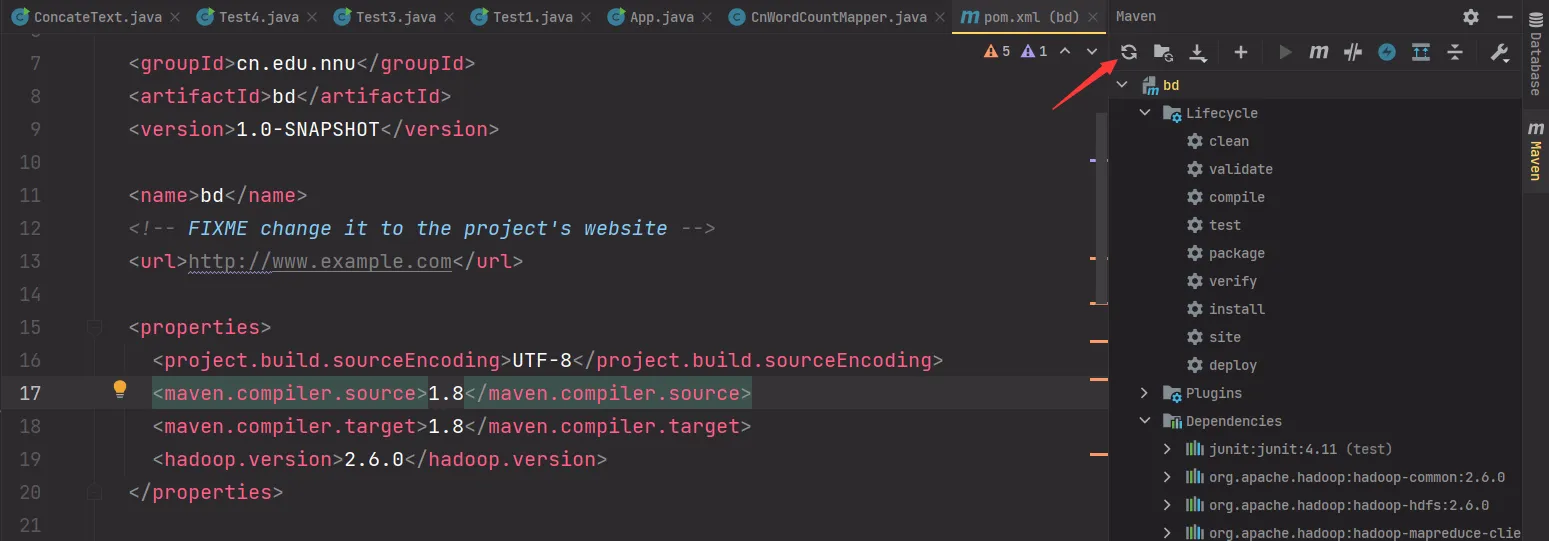
2.3.1. pom.xml 配置
在项目创建时,项目会自动生成 pom.xml 文件,对它进行一些修改。
- 添加
hadoop版本 - 添加
hadoop-common依赖 - 添加
hadoop-hdfs依赖
<properties>  <project.build.sourceEncoding>UTF-8</project.build.sourceEncoding>  <maven.compiler.source>1.8</maven.compiler.source>  <maven.compiler.target>1.8</maven.compiler.target>  <hadoop.version>2.6.0</hadoop.version></properties>
<dependencies>  <dependency>    <groupId>junit</groupId>    <artifactId>junit</artifactId>    <version>4.11</version>    <scope>test</scope>  </dependency>  <dependency>    <groupId>org.apache.hadoop</groupId>    <artifactId>hadoop-common</artifactId>    <version>${hadoop.version}</version>  </dependency>  <dependency>    <groupId>org.apache.hadoop</groupId>    <artifactId>hadoop-hdfs</artifactId>    <version>${hadoop.version}</version>  </dependency></dependencies>
2.3.2. 修改本机 hosts
在本机上添加 hosts,路径在 C:\\Windows\\System32\\drivers\\etc\\hosts
172.22.0.3 master172.22.0.4 slave1172.22.0.5 slave2172.22.0.6 slave32.3.3. 虚拟机中打开端口
为了省去一些麻烦,在虚拟机中关闭防火墙
sudo systemctl stop firewalld打开 hdfs 服务
start-dfs.sh2.4. 在 App.java 中测试
在 IDEA 中打开 main.java.cn.edu.nnu.App,尝试使用 Java 代码创建一个目录。
public class App{ public static void main( String[] args ) throws URISyntaxException, IOException { System.setProperty("HADOOP_USER_NAME", "lc"); Configuration config = new Configuration(); FileSystem fs = FileSystem.get(new URI("hdfs://master:8020"), config); boolean rt = fs.mkdirs(new Path("/demo")); System.out.println(rt); }}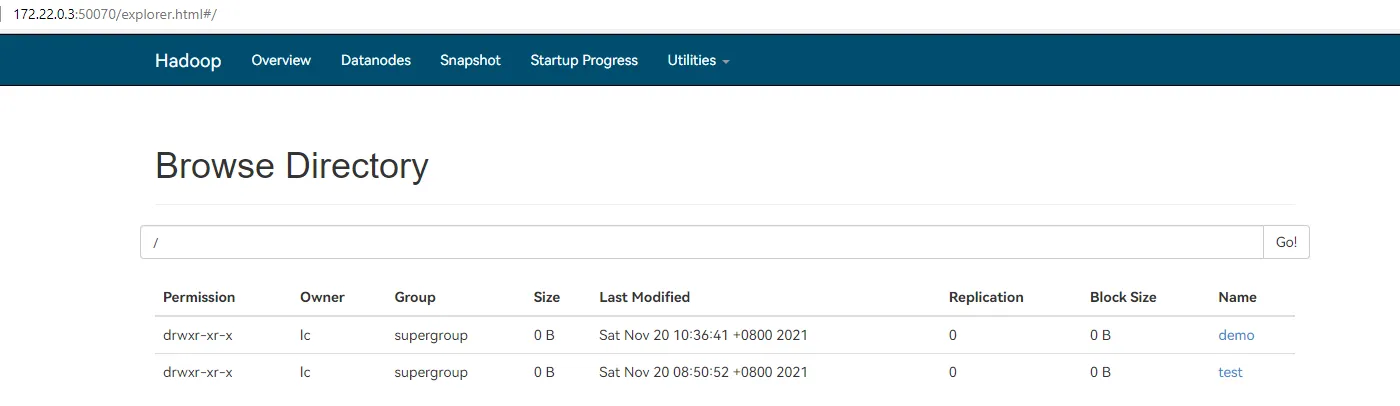
3. 使用 Java 代码对 hadoop 文件系统进行操作
App 类模板
public class App{  private static Configuration config = null;  private static FileSystem fs = null;
  public static void main( String[] args ) throws URISyntaxException, IOException {    System.setProperty("HADOOP_USER_NAME", "lc");    config = new Configuration();    fs = FileSystem.get(new URI("hdfs://master:8020"), config);    /* 操作 */  }}
3.1. 创建文件夹
private static void mkdir() throws IOException { boolean rt = fs.mkdirs(new Path("/demo")); System.out.println(rt);}3.2. 上传
private static void put() throws IOException { fs.copyFromLocalFile( new Path("C:\\Users\\row31976300\\Documents\\ForLearning\\software.txt"), // src new Path("/demo/soft.txt") // dst ); System.out.println("copy ok");}3.3. 下载
private static void get() throws IOException { fs.copyToLocalFile( false, // delSrc new Path("/demo/soft.txt"), // src new Path("C:\\Users\\row31976300\\Desktop\\1.txt"), // dst true // useRawLocalFileSystem ); System.out.println("get ok");}3.4. 删除
private static void delete() throws IOException { boolean rt = fs.delete(new Path("/demo/soft.txt"), true); if (rt) { System.out.println("delete ok"); }}3.5. 使用流操作进行传送
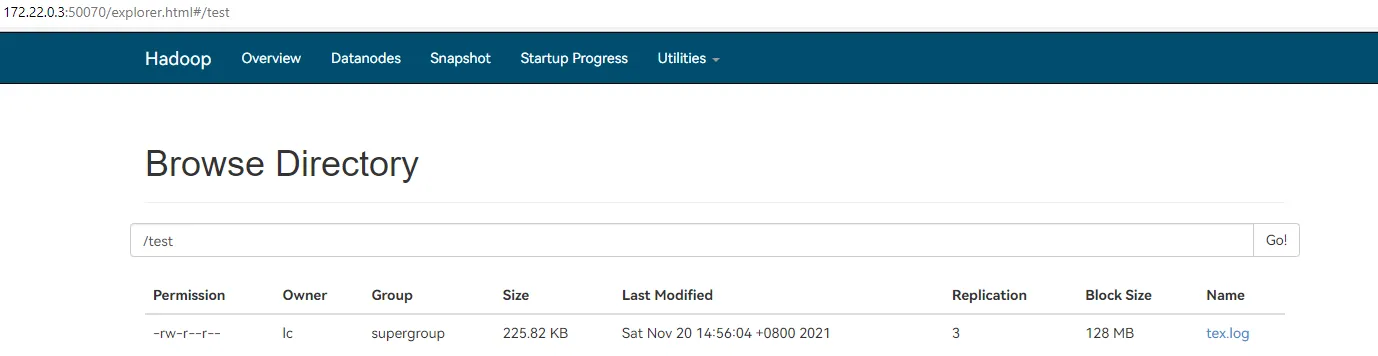
private static void concat() throws IOException { File path = new File("C:\\Users\\row31976300\\Documents\\...\\Tex"); // 本地路径 String[] names = path.list(new FilenameFilter() { // 读取路径下的文件名 @Override public boolean accept(File dir, String name) { return name.endsWith(".log"); } }); byte[] bts = new byte[4096]; // 按照 4KB 为单位 FSDataOutputStream out = fs.create(new Path("/test/tex.log")); for (int i = 0; i < Objects.requireNonNull(names).length; i++) { // 读取本地的匹配的文件 File file = new File(path, names[i]); FileInputStream fis = new FileInputStream(file); // 本地文件输入流 int size; while ((size = fis.read(bts)) > 0) { out.write(bts, 0, size); // 按 4KB 为单位向流中写入 } fis.close(); } out.close(); System.out.println("concat ok");}4. 伪分布式 Hadoop
4.1. 删除临时文件
4.1.1. 删除 tmp 文件夹和 hdfs 文件夹
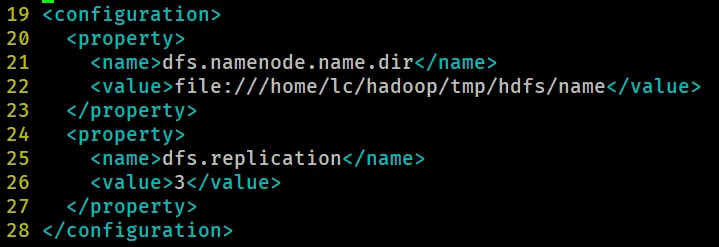
pwd/home/lc/hadooprm -r tmprm -r hdfs## 注:由于前面将 hdfs 建在 tmp 下,因此没有 hdfs 文件夹4.1.2. 修改 hdfs-site.xml
本机内存为 8G,将会使用 1 台 master 虚拟机和 2 台 slave 虚拟机,因此将 hdfs-site.xml 中的 value 值改为 3
4.1.3. 添加数据节点主机名
修改配置文件 hadoop/etc/hadoop/slaves,写入的从机作为数据节点的服务器。
slave1slave2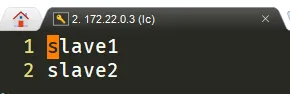
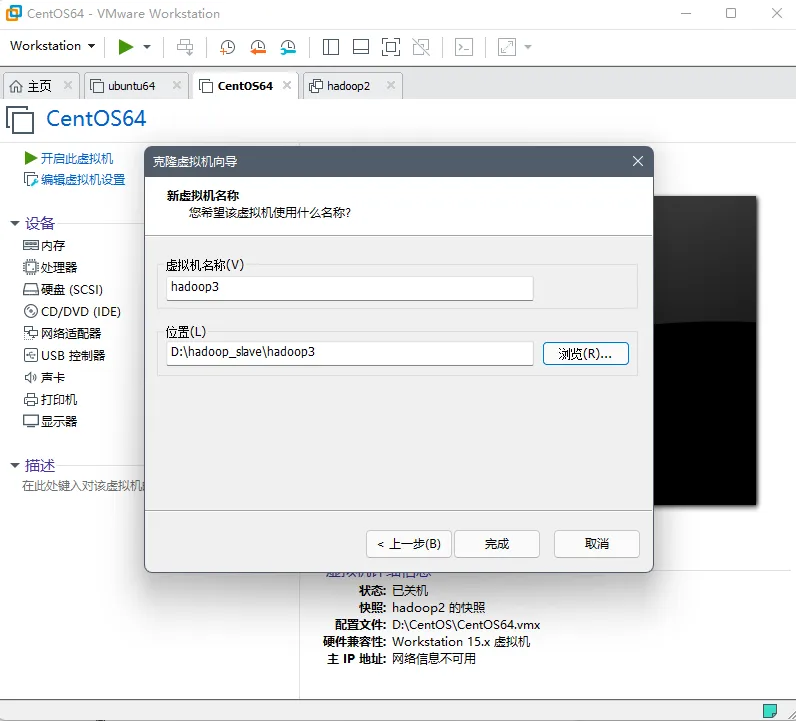
4.2. 克隆虚拟机
本机内存为 8G,因此克隆 2 台从属机,并且使用链接克隆。
4.3. 修改 IP & 修改主机名
4.3.1. 将 hadoop2 的 IP 地址分别改为预订的 IP
[lc@slave1 ~]$ sudo vi /etc/sysconfig/network-scripts/ifcfg-ens33IPADDR 172.22.0.4 # hadoop2
4.3.2. 重启网络服务并重连从属机
[lc@slave1 ~]$ sudo service network restart4.3.3. 使用命令改变主机名
[lc@slave1 ~]$ sudo hostnamectl set-hostname slave1 # hadoop24.3.4. 对于克隆机 hadoop3 也做同样的操作,IP 地址使用预写的 172.22.0.5
[lc@slave2 ~]$ sudo vi /etc/sysconfig/network-scripts/ifcfg-ens33IPADDR 172.22.0.5 # hadoop3[lc@slave2 ~]$ sudo service network restart[lc@slave2 ~]$ sudo hostnamectl set-hostname slave2 # hadoop34.4. 开启伪分布式文件系统
4.4.1. 测试每一台主机之间的连接
使用 ssh 命令测试每台主机之间两两互相连接。
[lc@master ~]$ ssh slave1[lc@master ~]$ ssh slave2[lc@slave1 ~]$ ssh master[lc@slave1 ~]$ ssh slave2[lc@slave2 ~]$ ssh master[lc@slave2 ~]$ ssh slave1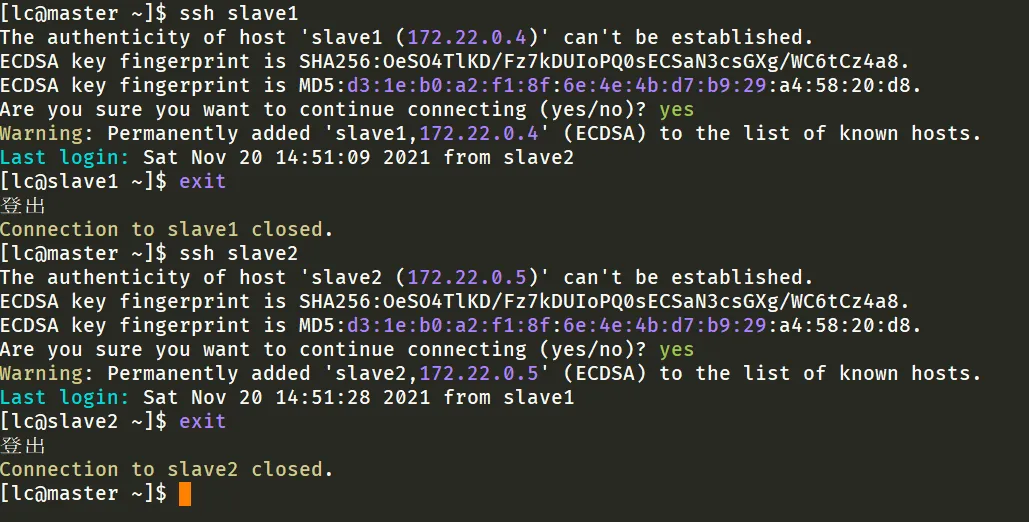
4.4.2. 关闭三台虚拟机的防火墙
[lc@master ~]$ sudo systemctl stop firewalld[lc@slave1 ~]$ sudo systemctl stop firewalld[lc@slave2 ~]$ sudo systemctl stop firewalld4.4.3. 重新初始化 NameNode
在 master 主机上执行命令
[lc@master ~]$ hdfs namenode -format4.4.4. 开启文件系统
在 master 主机上开启文件系统
[lc@master ~]$ start-dfs.sh
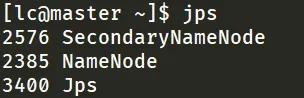
master 主机上的节点
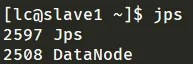
slave 从机上的数据节点
4.4.5. 运行测试程序
回到 IDEA,运行刚才写的程序。在 172.22.0.3:50070 端可以看到上传的文件,有多个副本 (Replication)。